
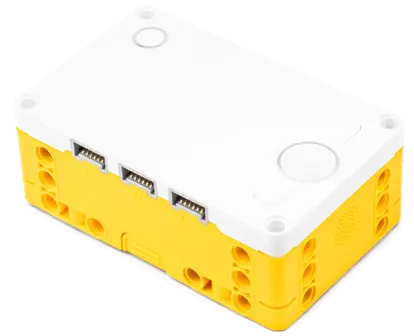
Pybricks Pro Environment (EXP6)
 +

Warning
Note: You are currently viewing the [Pybricks Pro Environment] tutorial. Applicable to SPIKE Prime flashed with Pybricks firmware. If you are using the official SPIKE App, click here to switch to the official tutorial。
The Pybricks environment not only provides millisecond-level blazing fast communication, but also perfectly supports 'Asynchronous Multitasking (Async/await)'. The exclusive EXP6 library utilizes this feature to build a 'Background Watchdog & Heartbeat Mechanism', ensuring the robot never disconnects during complex tasks.
Download Dedicated Library and Examples
(Note: Please place the downloaded MBC_exp6_obj_Lib.py into your Pybricks project to use it.)
1. Quick Start (Quick Start)
Welcome to the EXP6 Expander! This manual will teach you how to use the MBC_expObj_Lib library to control motors and read sensors.
Our library primarily supports Object-Oriented syntax, which is as intuitive as dragging blocks. Furthermore, to meet various challenges, each command is divided into Normal Mode and Multitask Mode:
- Normal Mode: Executes line by line sequentially. Simple and intuitive, suitable for basic teaching.
- Multitask Mode: Must prefix each command with the magic word
await, allowing the robot to do many things 'simultaneously'. Suitable for advanced robotics.
Initialize Expander and Run Task (Setup & Run Task)
Before using any function, you must instantiate the expander object in the set up stage, and depending on your chosen mode (Normal/Multitask), decide whether to import run_task. Assuming the expander is connected to the Hub's Port C (Port 3):
- Normal Mode: Set multitask to
falsewhen creating the object, and you can directly issue control commands inprogram. - Multitask Mode: Set multitask to
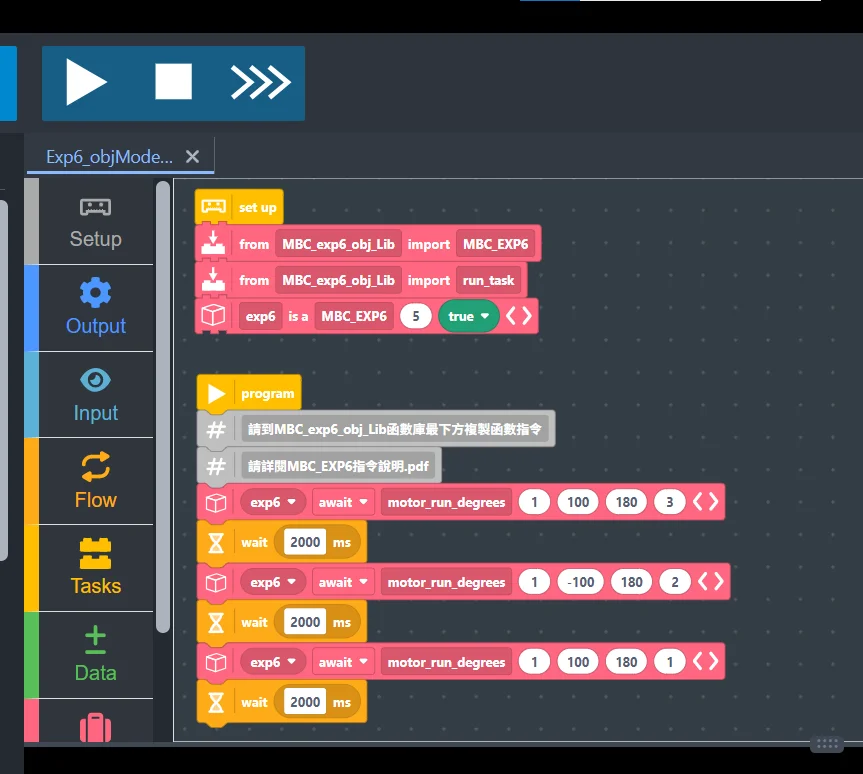
true, and you must import the expander's exclusiverun_taskfromMBC_exp6_obj_Lib. In the graphical interface, you just put the code under theprogramblock. When converting to Python, the system automatically wraps it intomain()and callsrun_task(main()). The exclusiverun_taskinternally starts the 'background heartbeat mechanism' to maintain connection and shuts down safely when finished.
Init Block MBC_EXP6 and Run Task
@turnRight set up :: #eeb014 from [MBC_exp6_obj_Lib] import [MBC_EXP6] :: #FF6680 @greenFlag [exp6] is a [MBC_EXP6] (3) (false :: #59C059) :: #FF6680@turnLeft program :: #eeb014 @greenFlag [exp6 v] [motor_power] (6) (100) ‹ › :: #FF6680 @greenFlag [exp6 v] [keep_alive_wait] (5000) ‹ › :: #FF6680
from MBC_exp6_obj_Lib import MBC_EXP6

# Set up.
exp6 = MBC_EXP6(3, False)

exp6.motor_power(6, 100)
exp6.keep_alive_wait(5000)
@turnRight set up :: #eeb014 from [MBC_exp6_obj_Lib] import [MBC_EXP6] :: #FF6680 from [MBC_exp6_obj_Lib] import [run_task] :: #FF6680 @greenFlag [exp6] is a [MBC_EXP6] (3) (true :: #59C059) :: #FF6680@turnLeft program :: #eeb014 @greenFlag [exp6 v] [await v] [motor_power] (6) (100) ‹ › :: #FF6680 @greenFlag [exp6 v] [await v] [keep_alive_wait] (5000) ‹ › :: #FF6680
from pybricks.tools import multitask, run_task, wait
from MBC_exp6_obj_Lib import MBC_EXP6, run_task

# Set up.
exp6 = MBC_EXP6(3, True)

async def main():
    await exp6.motor_power(6, 100)
    await exp6.keep_alive_wait(5000)

run_task(main())
2. Motor Control (Motor Control)
Control SPIKE motors connected to the EXP6 expander: set speed, PID closed-loop control, braking, PID tuning and dual-motor synchronized driving.
Start Motor (Power)
Drive the motor with raw power (open-loop PWM). No speed compensation, but the most direct and fastest response.
exp6.motor_power(port, power)
port: Port on the expander (1~6)power: Motor power (-100 ~ 100). Positive is clockwise, negative is counter-clockwise.
@greenFlag [exp6 v] [call v] [motor_power] (5) (50) ‹ › :: #FF6680
# Run the motor on expander port 5 at 50% power
exp6.motor_power(5, 50)@greenFlag [exp6 v] [await v] [motor_power] (5) (50) ‹ › :: #FF6680
await exp6.motor_power(5, 50)Closed-loop Run (Run)
Uses PID closed-loop control: the expander automatically adjusts power to the load so the speed stays at the set value.
exp6.motor_run(port, speed)
port: Port on the expander (1~6)speed: Target speed (-100 ~ 100). Positive is clockwise, negative is counter-clockwise.
@greenFlag [exp6 v] [call v] [motor_run] (1) (30) ‹ › :: #FF6680
# Make motor on port 1 maintain a steady speed of 30
exp6.motor_run(1, 30)@greenFlag [exp6 v] [await v] [motor_run] (1) (30) ‹ › :: #FF6680
await exp6.motor_run(1, 30)Precise Angle Control (Angle Control)
Set the motor to rotate a specific relative angle, or move to a specific absolute angle. Built-in PID and angle accumulator ensure precise movement.
exp6.motor_run_degrees(port, speed, degrees, stop) 與 exp6.motor_track_target(port, speed, angle, stop)
port: Port on the expander (1~6)speed: Target speed (-100 ~ 100). Positive is clockwise, negative is counter-clockwise.degrees: Relative angle to move (e.g., 360 is one full rotation forward). Range: -2499 ~ 2499.angle: Absolute angle to move to (0~359, automatically finds the shortest path).stop: Number indicating the behavior after reaching the target.1: Coast (STOP_COAST)2: Brake (STOP_BRAKE)3: Hold (STOP_HOLD)4: Continue (STOP_CONTINUE)
Note: motor_run_target is renamed to motor_track_target, but the old name is still supported.
⚠️ Angle commands return immediately — they do not wait for the motor to finish. If you send another angle command to the same motor while it is still turning, the expander drops the new command. Wait for the first move to finish before sending the next one (e.g. with keep_alive_wait; 360° at speed 30 takes about 1.2 s).
@greenFlag [exp6 v] [call v] [motor_run_degrees] (1) (30) (360) (3) ‹ › :: #FF6680
@greenFlag [exp6 v] [call v] [keep_alive_wait] (1500) ‹ › :: #FF6680
@greenFlag [exp6 v] [call v] [motor_track_target] (1) (30) (90) (3) ‹ › :: #FF6680
# 讓孔 1 馬達以速度 30 轉動 360 度 (相對角度),到達後Hold (HOLD)
exp6.motor_run_degrees(1, 30, 360, 3)

# Wait until it finishes before the next angle command (otherwise the next one is dropped)
exp6.keep_alive_wait(1500)

# Turn the port 1 motor at speed 30 to the 90° position (absolute angle), then hold
exp6.motor_track_target(1, 30, 90, 3)@greenFlag [exp6 v] [await v] [motor_run_degrees] (1) (30) (360) (3) ‹ › :: #FF6680 @greenFlag [exp6 v] [await v] [keep_alive_wait] (1500) ‹ › :: #FF6680 @greenFlag [exp6 v] [await v] [motor_track_target] (1) (30) (90) (3) ‹ › :: #FF6680
await exp6.motor_run_degrees(1, 30, 360, 3)
await exp6.keep_alive_wait(1500)   # wait until it finishes before the next angle command
await exp6.motor_track_target(1, 30, 90, 3)
Set PID Parameters (Set PID)
進階功能,用於手動調整馬達閉迴路控制的 P (比例)、I (積分)、D (微分) 參數,優化轉動的穩定性。請注意:50 是系統預設的Motor Control參數基準值。以 50 為基準,往上調整就是等比例放大,往下調整就是等比例縮小。
exp6.motor_set_pid(port, p, i, d)
@greenFlag [exp6 v] [call v] [motor_set_pid] (1) (50) (50) (50) ‹ › :: #FF6680
# Set PID parameters for motor on port 1
exp6.motor_set_pid(1, 50, 50, 50)@greenFlag [exp6 v] [await v] [motor_set_pid] (1) (50) (50) (50) ‹ › :: #FF6680
await exp6.motor_set_pid(1, 50, 50, 50)Stop and Brake (Stop & Brake)
你可以選擇讓馬達自然Coast停止,或是用力咬死Brake (鎖定維持在當前角度)。
exp6.motor_stop(port, stop) 與 exp6.stop_all(stop)
port: Port on the expander (1~6)stop: Number indicating the stop mode.1: Coast (STOP_COAST)2: Brake (STOP_BRAKE)3: Hold (STOP_HOLD)
@greenFlag [exp6 v] [call v] [motor_stop] (1) (1) ‹ › :: #FF6680
@greenFlag [exp6 v] [call v] [motor_stop] (1) (3) ‹ › :: #FF6680
@greenFlag [exp6 v] [call v] [stop_all] (1) ‹ › :: #FF6680
exp6.motor_stop(1, 1)  # 馬達斷電,自然Coast停止
exp6.motor_stop(1, 3)   # 咬死Brake,鎖定目前位置
exp6.stop_all(1) # 緊急停止!讓擴充板上所有馬達Coast停止@greenFlag [exp6 v] [await v] [motor_stop] (1) (1) ‹ › :: #FF6680 @greenFlag [exp6 v] [await v] [motor_stop] (1) (3) ‹ › :: #FF6680 @greenFlag [exp6 v] [await v] [stop_all] (1) ‹ › :: #FF6680
await exp6.motor_stop(1, 1)
await exp6.motor_stop(1, 3)
await exp6.stop_all(1)
Set Motor Inverted (Set Inverted)
Set the motor's default rotation direction. Reversing it at initialization automatically matches subsequent logic (including chassis control) without manual sign adjustments.
exp6.set_motor_inverted(port, inverted)
port: Port on the expander (1~6)inverted: Boolean (True/False).Truemeans inverted, defaults toTrueif omitted.
@greenFlag [exp6 v] [call v] [set_motor_inverted] (1) ‹ › :: #FF6680
# Invert the motor direction on port 1
exp6.set_motor_inverted(1, True)@greenFlag [exp6 v] [await v] [set_motor_inverted] (1) ‹ › :: #FF6680
await exp6.set_motor_inverted(1, True)Dual Motor Sync Control (Drive)
Simultaneously and precisely controls two motors, perfect for wheeled chassis robots (e.g., line followers).
exp6.drive(left_port, right_port, left_speed, right_speed)
@greenFlag [exp6 v] [call v] [drive] (1) (2) (50) (40) ‹ › :: #FF6680
@greenFlag [exp6 v] [call v] [drive_stop] (1) (2) (1) ‹ › :: #FF6680
# Make port 1 and 2 motors move forward at speed 50 and 40 simultaneously
exp6.drive(1, 2, 50, 40)

# Stop both motors (the 3rd argument stop is required: 1 coast, 2 brake, 3 hold)
exp6.drive_stop(1, 2, 1)@greenFlag [exp6 v] [await v] [drive] (1) (2) (50) (40) ‹ › :: #FF6680 @greenFlag [exp6 v] [await v] [drive_stop] (1) (2) (1) ‹ › :: #FF6680
await exp6.drive(1, 2, 50, 40)
await exp6.drive_stop(1, 2, 1)
3. Sensor Reading (Sensors)
Read sensor data and motor status. The expander automatically determines the sensor type and returns corresponding values.
Motor Angle & Speed
Get the current accumulated angle, absolute angle, or speed. Built-in 32-bit accumulator prevents overflow issues!
- Reset Angle:
reset_angle(port) - Read Accumulated Angle:
get_motor_angle(port) - Read Absolute Angle:
get_motor_abs_angle(port) - Read Speed:
get_motor_speed(port)
port: Port on the expander (1~6)
@greenFlag [exp6 v] [call v] [reset_angle] (1) ‹ › :: #FF6680
(@greenFlag [exp6 v] [call v] [get_motor_angle] (1) ‹ › :: #FF6680)
(@greenFlag [exp6 v] [call v] [get_motor_abs_angle] (1) ‹ › :: #FF6680)
(@greenFlag [exp6 v] [call v] [get_motor_speed] (1) ‹ › :: #FF6680)
# 將孔 1 馬達的Reset Angle
exp6.reset_angle(1)

# Read Accumulated Angle、絕對角度與速度deg/s
angle = exp6.get_motor_angle(1)
abs_angle = exp6.get_motor_abs_angle(1)
speed = exp6.get_motor_speed(1)
print("累積角度:", angle, "絕對角度:", abs_angle, "速度:", speed)@greenFlag [exp6 v] [await v] [reset_angle] (1) ‹ › :: #FF6680 (@greenFlag [exp6 v] [await v] [get_motor_angle] (1) ‹ › :: #FF6680) (@greenFlag [exp6 v] [await v] [get_motor_abs_angle] (1) ‹ › :: #FF6680) (@greenFlag [exp6 v] [await v] [get_motor_speed] (1) ‹ › :: #FF6680)
await exp6.reset_angle(1)

angle = await exp6.get_motor_angle(1)
abs_angle = await exp6.get_motor_abs_angle(1)
speed = await exp6.get_motor_speed(1)
print(angle, abs_angle, speed)
Color Sensor (Color Sensor)
取得 SPIKE Color Sensor的辨識結果與反射值。
Color Code get_color_color(port) and Reflection get_color_reflection(port)
port: Port on the expander (1~6)
(@greenFlag [exp6 v] [call v] [get_color_color] (3) ‹ › :: #FF6680)
(@greenFlag [exp6 v] [call v] [get_color_reflection] (3) ‹ › :: #FF6680)
# 讀取Color Code(-1 為無顏色,其他對應樂高標準色碼)
color_code = exp6.get_color_color(3)

# Read light reflection (0~100, suitable for line following)
reflection = exp6.get_color_reflection(3)(@greenFlag [exp6 v] [await v] [get_color_color] (3) ‹ › :: #FF6680) (@greenFlag [exp6 v] [await v] [get_color_reflection] (3) ‹ › :: #FF6680)
color_code = await exp6.get_color_color(3)
reflection = await exp6.get_color_reflection(3)
Advanced Color Channels (RGB / HSV)
除了基本的Color Code,你也可以讀取完整的 RGB 或 HSV 數值,甚至單獨擷取其中一個通道(例如只抓取紅色或色相)。這在進階影像識別或色彩過濾時非常實用。
Read full RGB and HSV tuples get_color_rgb(port) 與 get_color_hsv(port)
port: Port on the expander (1~6)
(@greenFlag [exp6 v] [call v] [get_color_rgb] (3) ‹ › :: #FF6680)
(@greenFlag [exp6 v] [call v] [get_color_hsv] (3) ‹ › :: #FF6680)
# Read RGB, returns (R, G, B), range 0~100
rgb = exp6.get_color_rgb(3)

# Read HSV, returns (H, S, V), H range 0~359, S/V range 0~100
hsv = exp6.get_color_hsv(3)(@greenFlag [exp6 v] [await v] [get_color_rgb] (3) ‹ › :: #FF6680) (@greenFlag [exp6 v] [await v] [get_color_hsv] (3) ‹ › :: #FF6680)
rgb = await exp6.get_color_rgb(3)
hsv = await exp6.get_color_hsv(3)
Single Channel Extraction get_color_red(port) 等
port: Port on the expander (1~6)
(@greenFlag [exp6 v] [call v] [get_color_red] (3) ‹ › :: #FF6680)
(@greenFlag [exp6 v] [call v] [get_color_hue] (3) ‹ › :: #FF6680)
# Read RGB channel individually (range 0~100)
r = exp6.get_color_red(3)
g = exp6.get_color_green(3)
b = exp6.get_color_blue(3)

# Read HSV channel individually (H: 0~359, S/V: 0~100)
h = exp6.get_color_hue(3)
s = exp6.get_color_sat(3)
v = exp6.get_color_val(3)(@greenFlag [exp6 v] [await v] [get_color_red] (3) ‹ › :: #FF6680) (@greenFlag [exp6 v] [await v] [get_color_hue] (3) ‹ › :: #FF6680)
r = await exp6.get_color_red(3)
g = await exp6.get_color_green(3)
b = await exp6.get_color_blue(3)

h = await exp6.get_color_hue(3)
s = await exp6.get_color_sat(3)
v = await exp6.get_color_val(3)
Ultrasonic & Force Sensors
Distance get_ultrasonic_distance(port) and Force Depth get_touch_force(port)
port: Port on the expander (1~6)
(@greenFlag [exp6 v] [call v] [get_ultrasonic_distance] (4) ‹ › :: #FF6680)
(@greenFlag [exp6 v] [call v] [get_touch_force] (5) ‹ › :: #FF6680)
# 讀取超音波Distance (單位:毫米 mm)
dist = exp6.get_ultrasonic_distance(4)

# Read touch sensor press force (0~100)
force = exp6.get_touch_force(5)(@greenFlag [exp6 v] [await v] [get_ultrasonic_distance] (4) ‹ › :: #FF6680) (@greenFlag [exp6 v] [await v] [get_touch_force] (5) ‹ › :: #FF6680)
dist = await exp6.get_ultrasonic_distance(4)
force = await exp6.get_touch_force(5)
System & Raw State (System & Raw)
Check what devices are plugged in, battery voltage, or grab raw bottom-layer data for debugging.
Get ID get_device_id(port)、Raw Data get_port_raw(port) and Voltage get_voltage()
port: Port on the expander (1~6)
(@greenFlag [exp6 v] [call v] [get_device_id] (1) ‹ › :: #FF6680)
(@greenFlag [exp6 v] [call v] [get_voltage] ‹ › :: #FF6680)
(@greenFlag [exp6 v] [call v] [get_port_raw] (1) ‹ › :: #FF6680)
# Returns device ID: 0=None, 1=Force, 3=Color, 4=Ultrasonic, 5=Motor
dev_id = exp6.get_device_id(1)

# Returns current battery voltage (e.g., 8.25 V)
volts = exp6.get_voltage()

# Get unparsed raw data from port 1 (uint16)
raw_data = exp6.get_port_raw(1)(@greenFlag [exp6 v] [await v] [get_device_id] (1) ‹ › :: #FF6680) (@greenFlag [exp6 v] [await v] [get_voltage] ‹ › :: #FF6680) (@greenFlag [exp6 v] [await v] [get_port_raw] (1) ‹ › :: #FF6680)
dev_id = await exp6.get_device_id(1)
volts = await exp6.get_voltage()
raw_data = await exp6.get_port_raw(1)
4. System Heartbeat (Keep Alive) (Heartbeat)
EXP6 擴充板需要與主控端維持通訊的「心跳訊號」。如果您在初始化時設定了 multitask=True,系統會在背景自動發送心跳,您不需要使用以下指令。但如果您使用Normal Mode (multitask=False),請務必使用以下指令來維持通訊,否則擴充板0.5秒內沒有收到心跳訊號會自動關閉馬達電力輸出。
Heartbeat Wait (Wait)
在Normal Mode下,請使用這個指令來取代原本系統的 wait 或 sleep,它會在等待期間自動幫你維持與擴充板的通訊。
exp6.keep_alive_wait(ms)
ms: Wait time (milliseconds)
@greenFlag [exp6 v] [call v] [keep_alive_wait] (1000) ‹ › :: #FF6680
# Wait 1 second (1000 ms), sending heartbeats automatically
exp6.keep_alive_wait(1000)
Manual Keep Alive (Keep Alive)
If you have a time-consuming while or for loop, call this inside the loop to ensure the connection isn't dropped.
exp6.keep_alive()
@greenFlag [exp6 v] [call v] [keep_alive] ‹ › :: #FF6680
# Manually send heartbeat in a long loop
while True:
    # Perform heavy calculations or sensing tasks...

    # Ensure communication is not interrupted
    exp6.keep_alive()
5. Advanced Exploration (Advanced)
This section is for advanced developers wanting to understand the library's underlying principles.
Functional API (Functional API)
The library also provides global functions named after the object methods with an exp_ prefix (e.g. exp_motor_power). They act on the most recently created MBC_EXP6 object, so you still need to create an MBC_EXP6(...) object once; after that you can call them without exp6.:
Importing and Using the Functional API
from MBC_exp6_obj_Lib import MBC_EXP6, exp_motor_power, exp_get_motor_angle

# Create the object once (hub port 3 = C, multitask=False)
MBC_EXP6(3, False)

# Power the motor on port 5
exp_motor_power(5, 50)

# Read angle of port 5
angle = exp_get_motor_angle(5)