
Pathfinder 16-Way (Line16) × MATRIX × MATRIXblock stock blocks
Interactive tutorialMATRIX
First time? Try the interactive tutorial in your browser first, then follow the steps below with your hub.
This page covers MATRIXblock stock colour-sensor blocks (0x22) only: how to set it up for the Pathfinder 16-Way (Line16) on MATRIX Mini R4, how to read every value, the commands it supports and examples. Use the switcher above to change product, host or software.
Which edition and how to connect
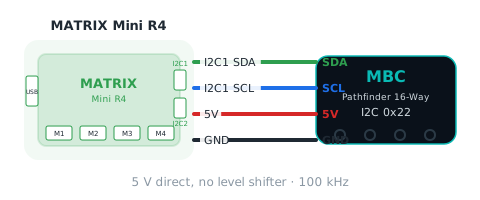
Get the MATRIX edition and connect it with the stock MATRIX 4-pin cable to I2C1 or I2C2 of the Mini R4 (address 0x22); pick that port in the block.
Tip
Tested on MATRIX Mini R4 (2026-11-06): the stock MATRIXblock colour-sensor blocks (address 0x22) read the line position, fine position, line width and light values correctly (line on the left = negative) on white, centred, left and right; 2000 reads in a row with no errors.
Setup
What you need
- Sensor: Pathfinder 16-Way (Line16) (MATRIX edition).
- Controller: MATRIX Mini R4.
- Cable: the stock MATRIX 4-pin sensor cable.
- Software: MATRIXblock (the stock MATRIX block software). This method needs no extra library.
Install the software
- Install MATRIXblock (default folder
C:\matrixblock-r4\).
Make the software see the sensor
The Mini R4 sees the sensor as a stock colour sensor (I2C address 0x22); read it with the built-in blocks, no extension needed:
- The "colour sensor → R / G / B / C / M / Y / K" blocks each read one
0 ~ 255number. The firmware packs the product data into these seven slots; see the readings below for what each slot means. - MATRIXblock's Arduino mode works too:
MiniR4.I2C1.MXColor.getColor(R).
Warning
Do not use the H / S / V or colour ID blocks: the controller computes those from R, G, B itself, so they mean nothing for MBC products. MATRIX removed the grey-level and colour-number blocks, so only these seven slots are usable.
Wiring
- Connect the stock MATRIX 4-pin sensor cable to the Mini R4 I2C1 or I2C2 port.
- Choose that port in the blocks (for example
I2C1). - 5 V direct, no level shifter needed.
Calibrate first (only once)
The Pathfinder has to "learn" the black and white of your mat before its numbers are right. Calibration is stored in the sensor and survives power-off (until you change mats).
- Plug in the sensor and turn the hub on (the sensor lights come on).
- Hold the calibration button for about 0.5 s, then release it (do not keep holding it; holding it keeps restarting calibration).
- When the green calibration LED (next to the button) lights up, sweep the sensor back and forth between the black line and the white floor within 5 seconds. All 16 sensing points must pass over the darkest black line and the brightest white area.
- Keep the sensor 3~12 mm above the surface while sweeping; higher reads poorly.
- The green LED goes off = calibration done, saved in the sensor automatically.
How do I know it worked? On the white floor the "line width" is 0; on a normal black line it is 3~5.
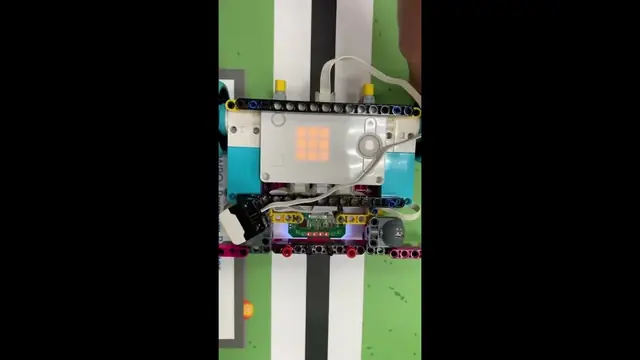
First test
- Show the number from the "colour sensor → R" block.
- If the number changes with what is in front of the sensor, everything is connected.
FAQ
- The numbers make no sense? Make sure you use the seven slots R / G / B / C / M / Y / K, not the H / S / V or colour ID blocks.
Reading values
Use the stock MATRIXblock colour-sensor R / G / B / C / M / Y / K blocks (not H / S / V or colour ID); the Arduino-mode line is shown too.
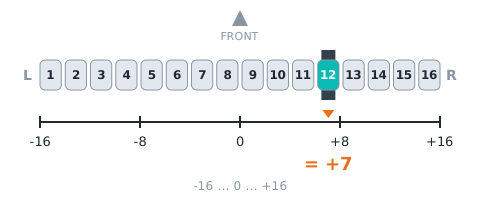
line position linePos
| Range | Meaning |
|---|---|
-16~+16 |
which channel the line is under: −16 (far left) to +16 (far right), 0 = centre; seen from behind the robot, negative = left (normally ±15; ±16 only for 200 ms after the line leaves the outermost channel) |
Block "colour sensor → R", subtract 16
int linePos = MiniR4.I2C1.MXColor.getColor(R) - 16; // line positionfine position linePosFine
| Range | Meaning |
|---|---|
-100~+100 |
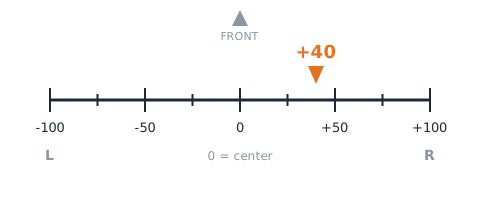
sub-channel position: −100 to +100, 0 = centre, negative = left (same sign as line position) |
Block "colour sensor → B", subtract 100
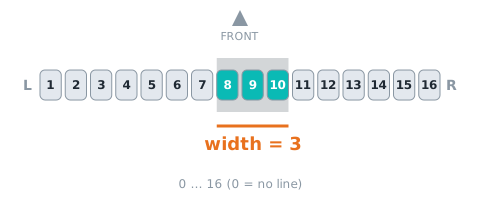
int linePosFine = MiniR4.I2C1.MXColor.getColor(B) - 100; // fine positionline width lineWidth
| Range | Meaning |
|---|---|
0~16 路 |
number of channels on the line, 0~16; 0 = no line |
Block "colour sensor → G"
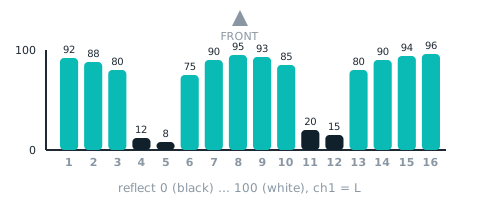
int lineWidth = MiniR4.I2C1.MXColor.getColor(G); // line widthchannel 1~16 reflect light
| Range | Meaning |
|---|---|
0~100 |
calibrated reflect of channel 1 |
Blocks "colour sensor → CK": CK 四路一組,每路 2 bit(convert3:024→0、2549→1、5074→2、75100→3):第 1 路在 bit7-6 … 第 4 路在 bit1-0;C = 第 14 路、M = 58、Y = 912、K = 1316
int raw = MiniR4.I2C1.MXColor.getColor(C); // group 1Not readable here:line segments, line bitmap, last exit direction, threshold, calibrations done. Use Arduino / mBlock / micro:bit for these.
Commands
This software cannot send commands; use Arduino I2C, mBlock or micro:bit if you need them.
Examples
There is no full example program for this software yet. Each item under “Reading values” and “Commands” above comes with code you can use as is; put them together in order, or contact us for a full example.
More questions
Still stuck? Contact us with your software and a screenshot of the program.
Downloads
Sources
- Host and software list:
_build/guides.json - Values and commands:
_build/protocol/line16.json(single source of truth) - Setup:
_build/guides/software/matrix-matrixblock.en.md、_build/guides/product/line16/matrix-matrixblock.en.md